Do you want to search in all categories or in this category ?
A comprehensive manual on how to onboard your Hub.
Setting up your Hub profile is the first step on your Mereka Connect onboarding journey! This article will walk you through the application process so that you can prepare all the necessary information and populate your profile in no time!
You may always save your application even if it's not 100% complete and come back to edit it later. All you need to do is click the "Save and Exit" button at the bottom of the page. We also recommend you read our tips & guidelines, so that each step of your onboarding process runs flawlessly!
Go to mereka.io.
If you already have an account on Mereka Connect, proceed to log in as usual, then navigate to your profile icon and select “Become a Hub” from the dropdown menu.
If you do not have an account on Mereka Connect yet, select the “Get Started” button at the top right corner, create an account via email/Gmail/Apple ID (Facebook is currently in the works), and select “As a Hub” on the welcome screen.

Alternatively, you can scroll down to the bottom of the homepage and simply click "Become a Hub" in the footer section. You would be prompted to create an account before proceeding to the Hub onboarding form.
You may choose to read a basic introduction of Hubs and the features we offer, or you may skip straight to the Hub onboarding form by clicking on the “Skip” button at the top right corner.

Creating a Hub on Mereka Connect is easy - all you have to do is fill in the basic information about your organization or business by following the steps below.

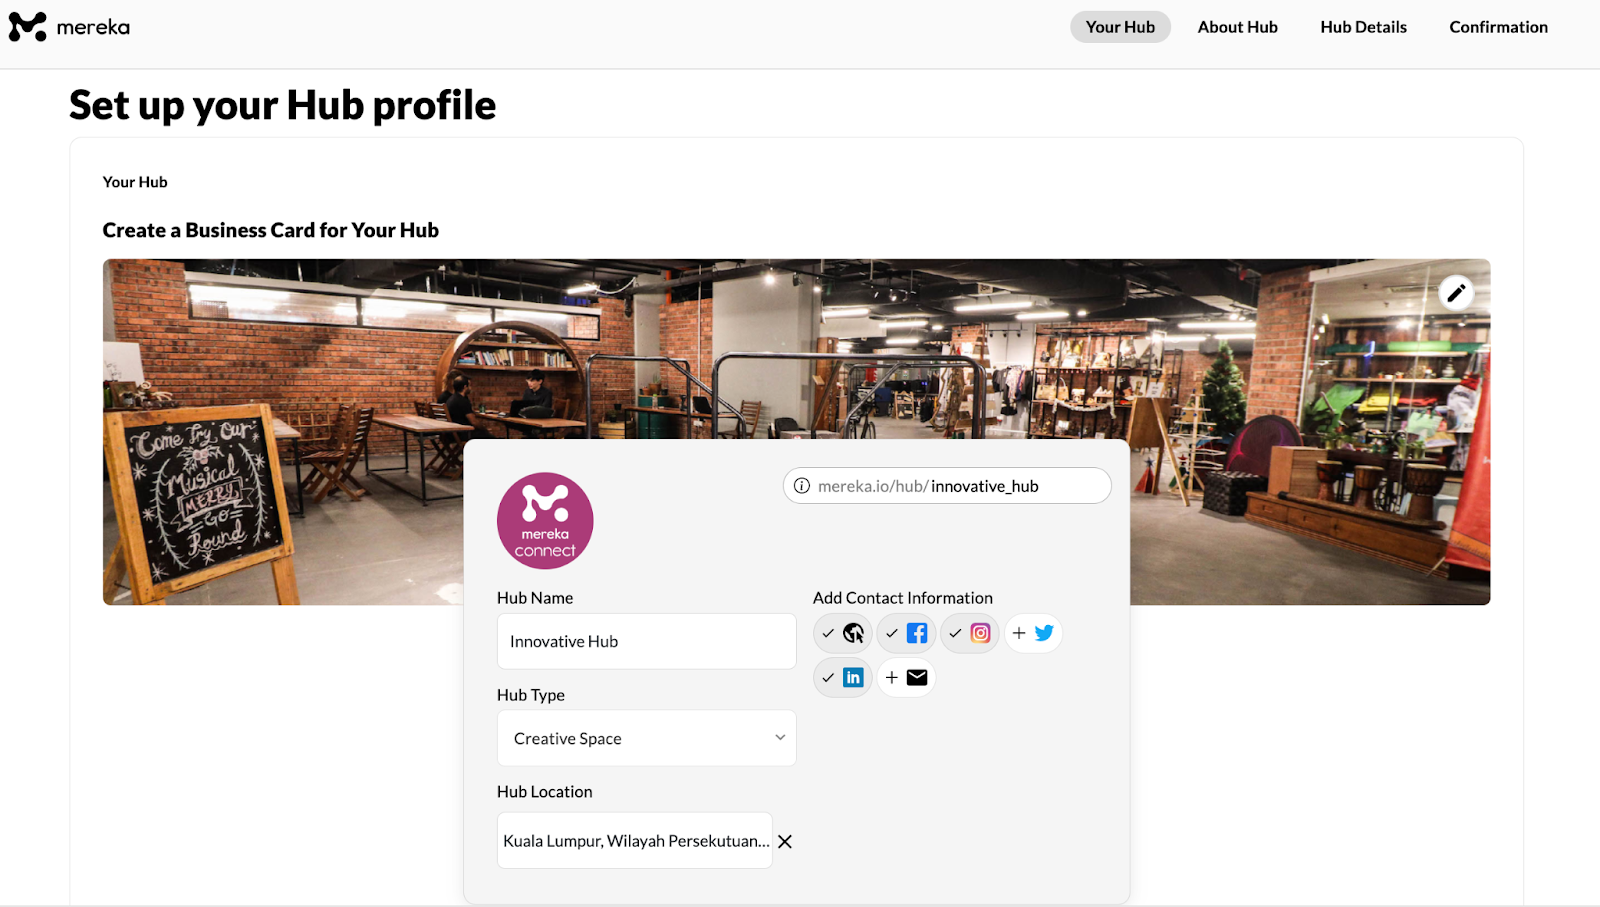
Fill in your Hub name, select a Hub type and enter your location.
Upload your profile photo (logo). The recommended ratio is 1:1 for the profile image.
Once you have completed all fields and uploaded the logo, please click "Confirm".

You'd be redirected to the welcome screen with the three options above. We recommend selecting the “Complete Hub Profile” option so that it is fully populated and ready to go live. Alternatively, you may click "View Hub Dashboard" to explore your booking management tools and settings.
Should you decide to proceed with populating your profile further, please follow the steps below to finalize your onboarding process.
Firstly, return to the "Your Hub" section and create a business card for your Hub (more on how to make it look attractive to users here).
Upload a cover photo of a 4:1 ratio. Learn more about choosing great photos for your Hub here.
Customize the URL of your Hub profile (optional, scroll down for detailed instructions).
Add the contact information of your Hub such as your website, email, Facebook, etc. Adding this information is optional, however we strongly encourage you to provide as many details as possible for the benefit of users who'd like to explore your Hub.
Unique URLs can now be made for your Hub profile so that users recognize you at first sight from the link itself!
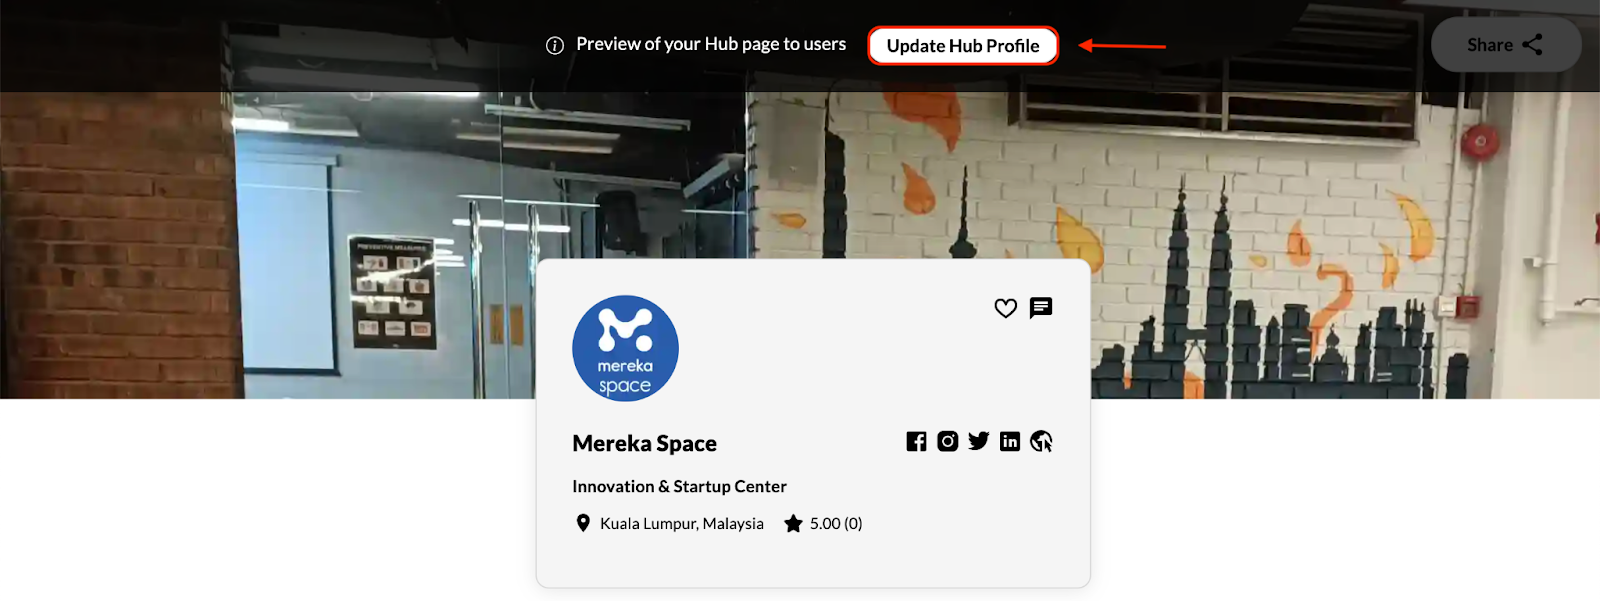
Your Hub Profile's URL can be viewed by accessing your Hub Dashboard in the upper right corner of the home page, clicking "Visit Hub Profile", and then pressing "Update Hub Profile".
Setting up a customized URL is simple:
After pressing "Update Hub Profile", type your desired URL in the top right corner of your Business Card.
Next, press the copy icon in the field to share the link after saving your new URL.
Click the "Confirmation" tab at the top of the page and then press "Confirm" to save your changes!
This URL will always direct users to your Hub profile page, whether logged in as users or logged out.

After entering your details into the "Your Hub" section, click "Continue" or navigate to the "About Hub" section.
Provide a description for your Hub. Please make sure it is concise (no more than 1000 characters) - you may use the description from your social media and company web page.
Select your Hub's focus area (you may choose multiple options). If your focus area differs from the suggested options, please let us know your suggestions via [email protected] or by clicking the following link.
Add the services your Hub is offering (Experience and/or Space types), alongside any additional tags you might want to be identified with your Hub. Examples include “Art”, “STEM Education”, "Sustainability", etc. Tags serve as keywords for users to understand better what you do.
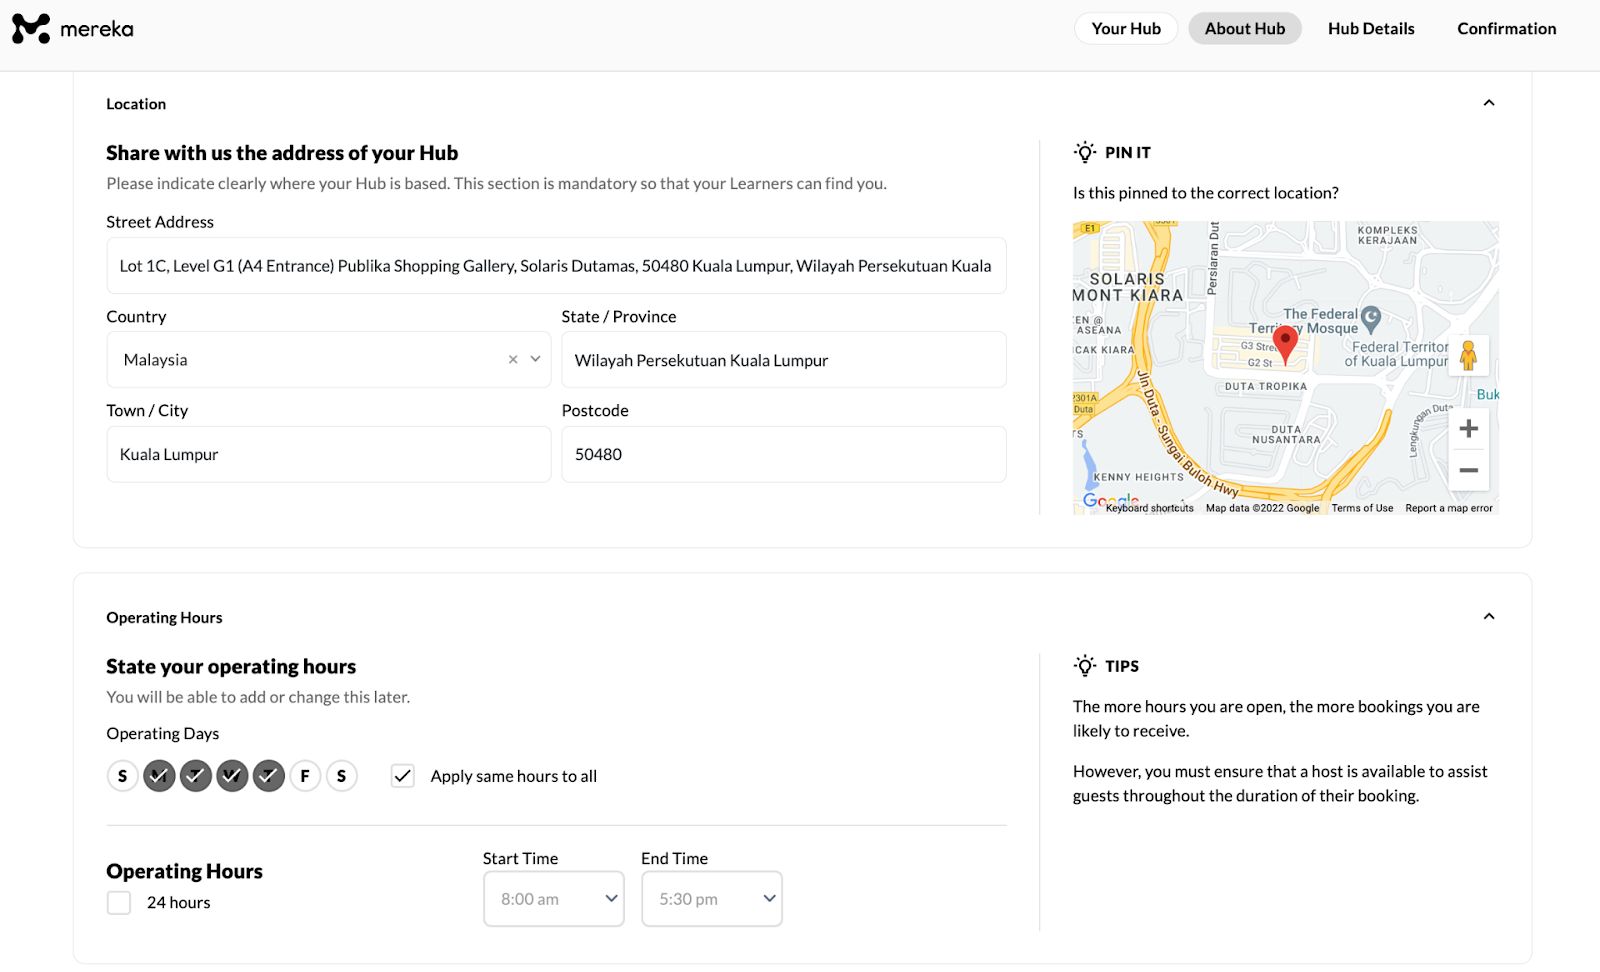
Provide a more detailed address of your Hub (same as indicated on Google Maps). You can also move the pin around the map if it isn’t exactly where you want it to be. An exact location will help your users find you more easily!
Lastly, input your operating days and hours. If your Hub operates during the same hours every day, click all circles and tick "Apply same hours to all". You'd be able to input the exact time afterwards.
Once you have completed all steps, press "Continue" and proceed to "Hub Details". This section is optional but we highly encourage you to populate it as well.
Spruce up your Hub profile by adding an intro video to establish connection with your user community. You may insert a YouTube link or any other source where your video is stored.
Upload 3-5 photos that highlight the different aspects of your Hub. Images may include your Hub's facilities, team members or footage of your services (Experiences or Spaces). You may upload the photos of various ratios - more on that here.
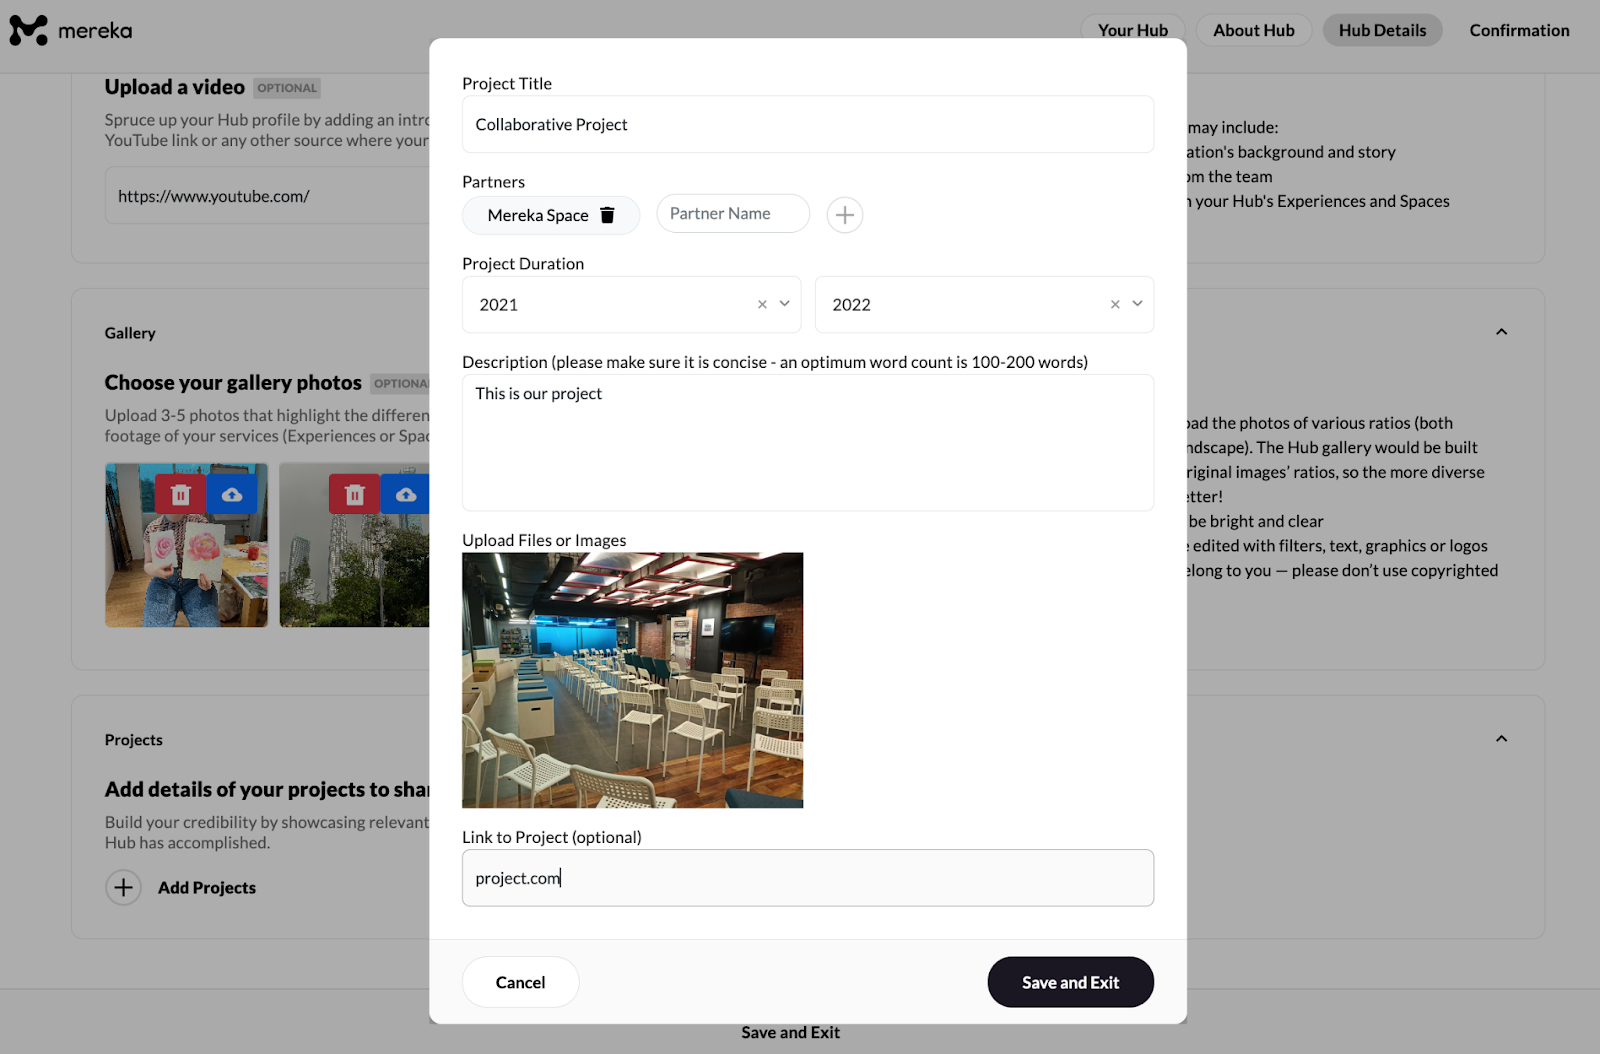
Add the details of your past and current projects to share with the user community. By clicking "Add Projects" you'd be able to include the project title, relevant partners, project duration, description and any supporting files and links.
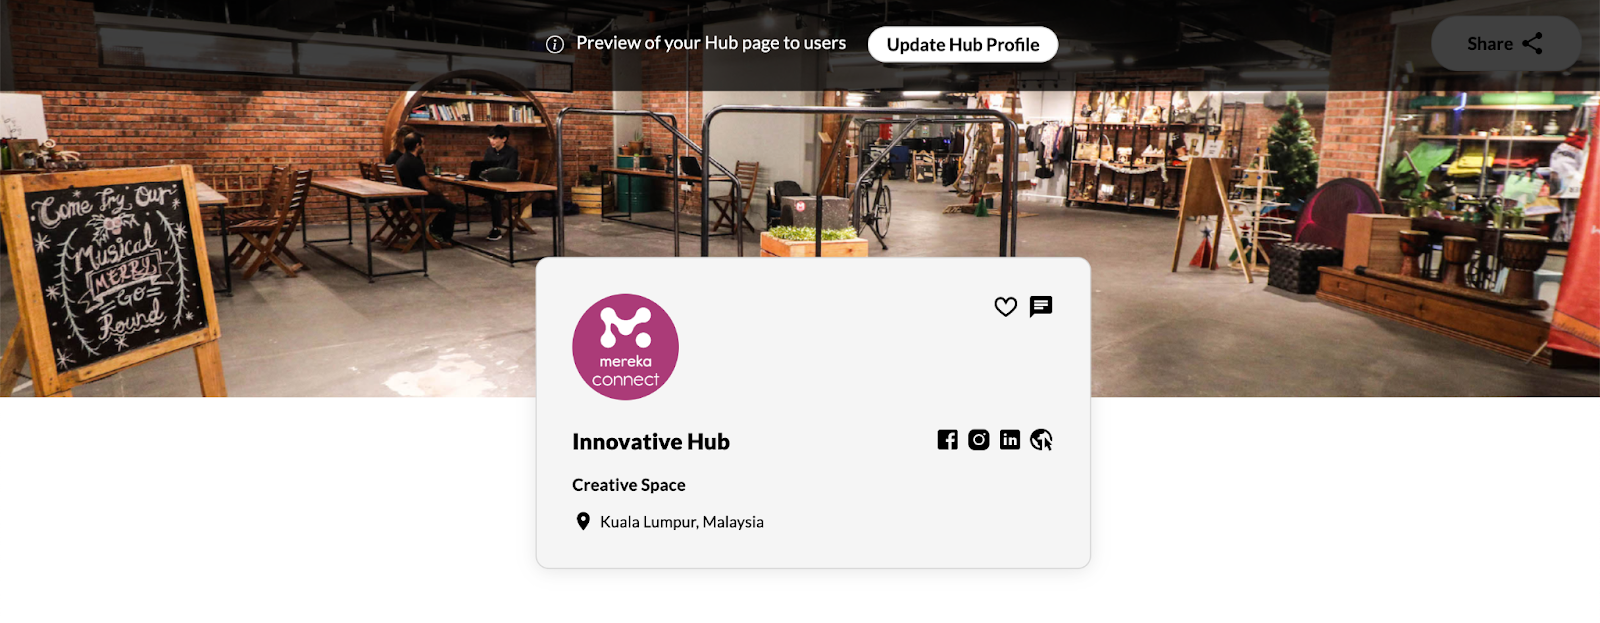
The final step would be the confirmation page, which shows you the view a user would see when they click on your Hub profile. It contains all the information that you have entered on the previous pages. Once you have reviewed all the details and ensured they are accurate, click the “Confirm” button.
In case you have inputted placeholder information or your Hub details have changed and you need to edit them, you may always click the "Save and Exit" button at the bottom of the page.
To get back to the Hub onboarding form and edit the information you need:
navigate to your user icon at the top right corner of the screen and click "Hub Profile", or
click the "View Hub Profile" tab in the "Overview" section of the dashboard, or
click the "Hub's Profile" quick access card in the "Account" section of the Settings.
It is possible to edit the profile anytime by clicking the "Update Hub Profile" button below the top navigation bar.
Voilá - your Hub form has been submitted! All Hub profiles are carefully reviewed by the Mereka Connect team to ensure they meet our requirements and quality standards. To learn about what makes a successful Hub profile (and what doesn’t!), please follow this link.
An email saying that your application is being processed would be sent to your inbox. You will be notified of the outcome of your Hub application within 1-2 working days, so do keep an eye on your inbox! If you have any further questions until then or would like to speak to a member of our team, please contact us via [email protected] or by replying to the application processing email in your inbox.