Help your Learners enjoy your Experience their way by giving them ticket types to choose from!
This feature offers versatility for Hubs to tailor their Experience to a range of different needs in the form of various ticket types! In this article, you will learn about the different ticket types you can offer for your Experiences, as well as how you can customize each type.
You may add, remove, and edit ticket types when listing a new Experience or editing an existing one.
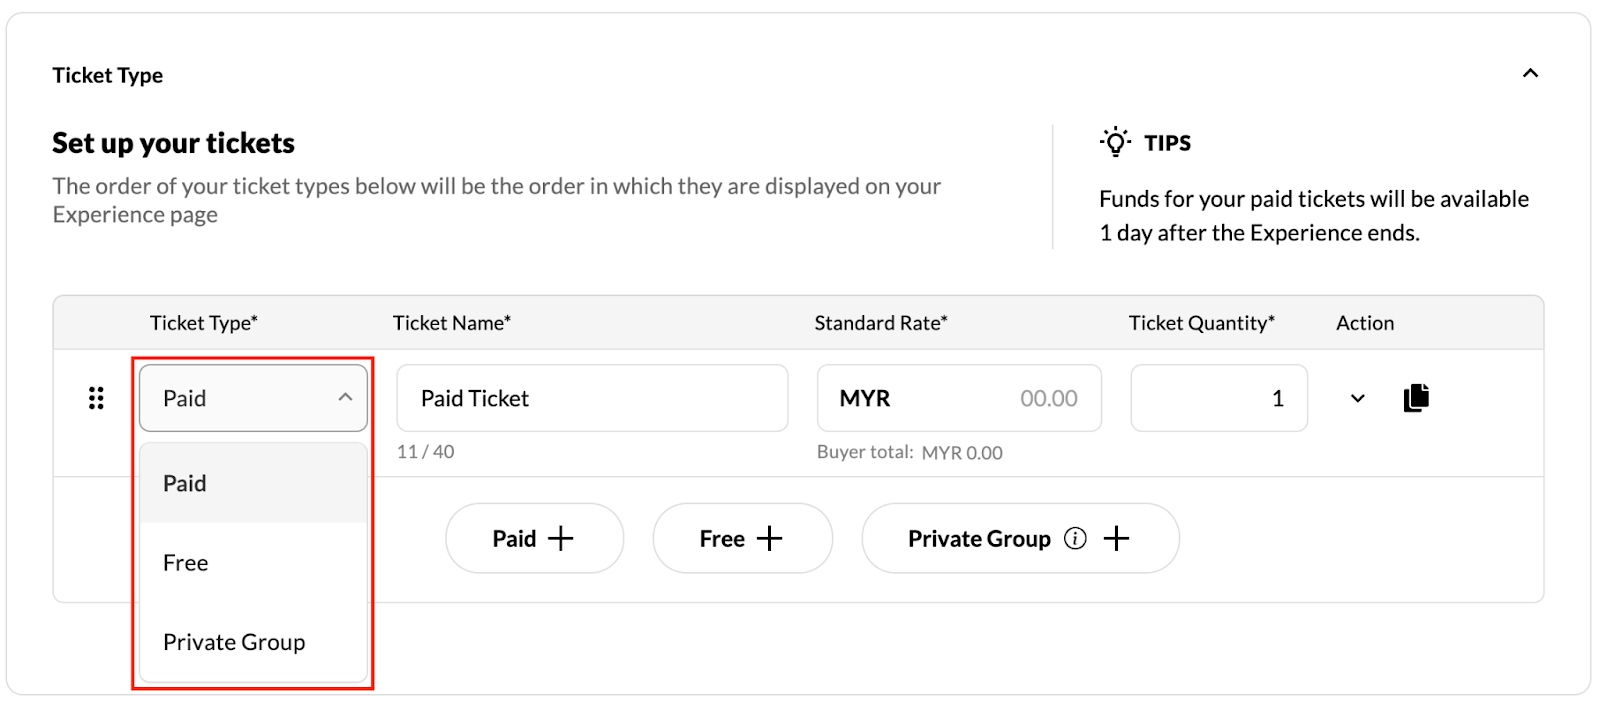
There are three 3 types that you can offer for your Experience:
Free: This ticket type is free of charge. It is limited to one ticket per Experience.
Paid: This ticket type is not free and can be charged at any amount specified by you. Bear in mind that your subscription plan determines the number of paid ticket types allowed per Experience!
Private Group: This ticket type allows Learners to book your entire Experience, as long as the group size does not exceed the maximum ticket quantity. It is limited to one ticket per Experience.
To add a new ticket, press the “Paid”, “Free”, or “Private Group” buttons at the bottom of the “Ticket Type” section.
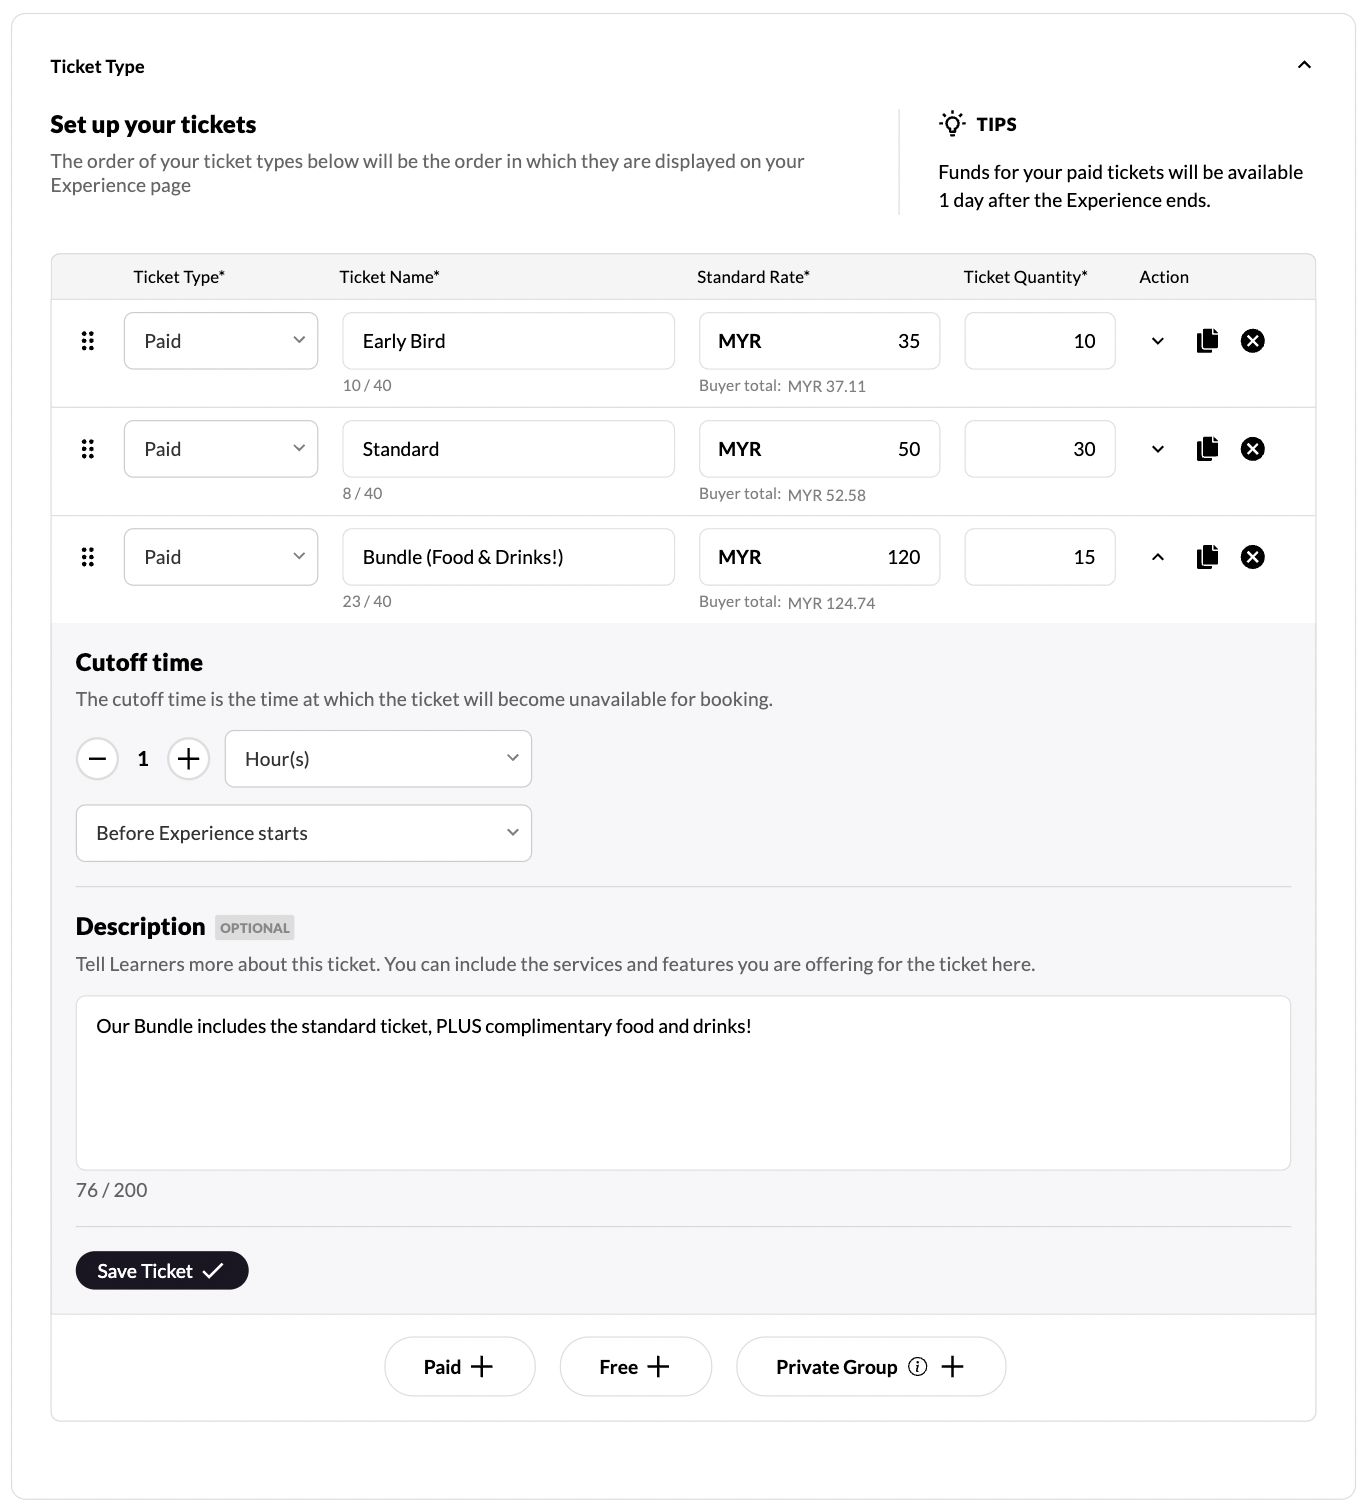
Each ticket consists of several details:
Ticket type: Choose between free, paid, and private group ticket types
Ticket name: Write a title for your ticket (not more than 40 characters long)
Standard rate: Set a specific price for your ticket
Ticket quantity: Set a number of tickets available for each ticket type
Cutoff time: Set a time at which the ticket will become unavailable for booking. You can set a cutoff time of a certain number of hours, days, or weeks before your Experience starts.
Description (optional): Tell Learners more about this ticket. You can include the services and features you are offering for the ticket here. The description should also be concise (not more than 200 characters long).

There are also several actions for setting up tickets:
Press
 to expand a ticket and edit its Cutoff time and description, and press
  to collapse the expanded window.
Press
 to make a copy of a ticket. This button applies to paid tickets only.
 Click and drag
 to reposition your ticket.
Press
 to delete a ticket.
After filling all the relevant fields, press the “Save Ticket” button to confirm your ticket’s details and save it.
Ticket types are a great way to tailor what your Experiences offer in a variety of unique ways, such as Early Bird tickets, packages, bundles, and more!
Will all ticket types apply to all time slots?
Yes. If you have 2 time slots, (following the example above) there would be 10 early bird tickets, 30 standard tickets and 15 bundle tickets available for each of your 2 slots – a total of 55 tickets available per slot.
That’s everything you need to know about the ticketing feature! We hope you find this article useful – and if you have any questions, feel free to reach out to us at team@mereka.io!